物体检测
本文主要给大家介绍如何在Android平台下使用角蜂鸟调用SSD-Mobilenet卷积神经网络,实现物体检测
准备工作
- 配置环境等详情请参照Hello 2018里的快速开始,此处不具体阐述。
- 下载物体检测所需模型graph_object_SSD文件,在您Android Studio中,当前module下新建assets包,将下载的模型文件复制到该目录下,该模型支持20种物体的检测。
- 因工程需要处理图像,所以使用了javacv库,可从GitHub自行下载或点击链接从示例工程中拷贝到自己工程下。
具体实现
本文体验的模型文件提供的20种物体检测包含:
  String[] labels = {"aeroplane", "bicycle", "bird", "boat",
      "bottle", "bus", "car", "cat", "chair",
      "cow", "diningtable", "dog", "horse",
      "motorbike", "person", "pottedplant",
      "sheep", "sofa", "train", "tvmonitor"};
主要实现流程:
- 开启设备
- 将graph文件传输到角蜂鸟里
- 处理图像数据
- 获取返回的处理结果
- 结果显示在view上
俩种实现模式
使用角蜂鸟内置摄像头,主要业务逻辑代码如下:
int status = openDevice();
if (status != ConnectStatus.HS_OK) {
    return;
}
int id = allocateGraphByAssets("graph_object_SSD");
if (id < 0) {
    return;
}
while (true) {
       byte[] bytes = getImage(0.007843f, 1f,id);
       float[] result = getResult(id);
       if (bytes != null && result != null) {
           opencv_core.IplImage bgrImage = null;
           if (zoom) {
               FRAME_W = 640;
               FRAME_H = 360;
               bgrImage = opencv_core.IplImage.create(FRAME_W, FRAME_H, opencv_core.IPL_DEPTH_8U, 3);
               bgrImage.getByteBuffer().put(bytes);
           } else {
               FRAME_W = 1920;
               FRAME_H = 1080;
               byte[] bytes_rgb = new byte[FRAME_W * FRAME_H * 3];
               for (int i = 0; i < FRAME_H * FRAME_W; i++) {
                   bytes_rgb[i * 3 + 2] = bytes[i];//r
                   bytes_rgb[i * 3 + 1] = bytes[FRAME_W * FRAME_H + i];//g
                   bytes_rgb[i * 3] = bytes[FRAME_W * FRAME_H * 2 + i];//b
               }
               bgrImage = opencv_core.IplImage.create(FRAME_W, FRAME_H, opencv_core.IPL_DEPTH_8U, 3);
               bgrImage.getByteBuffer().put(bytes_rgb);
           }
       } else {
           continue;
     }
}
使用外部图像数据,调用接口为loadTensor(),传入的数据要预处理
SoftReference<Bitmap> softRef = new SoftReference<>(Bitmap.createBitmap(1280, 720, Bitmap.Config.ARGB_8888));
Bitmap bitmap = softRef.get();
allocations[0].copyTo(bitmap);
Matrix matrix = new Matrix();
matrix.postScale(300f / 1280, 300f / 720);
Bitmap newbm = Bitmap.createBitmap(bitmap, 0, 0, 1280, 720, matrix,true);
int[] ints = new int[300 * 300];
newbm.getPixels(ints, 0, 300, 0, 0, 300, 300);
float[] float_tensor = new float[300 * 300 * 3];
for (int j = 0; j < 300 * 300; j++) {
float_tensor[j * 3] = Color.red(ints[j]) * 0.007843f - 1;
float_tensor[j * 3 + 1] = Color.green(ints[j]) * 0.007843f - 1;
float_tensor[j * 3 + 2] = Color.blue(ints[j]) * 0.007843f - 1;
}
int status_load = mFaceDetectorBySelfThread.loadTensor(float_tensor, float_tensor.length, id);
结果注解:
- 每7个数为一组数据
- 数组的第一组数的第一个数是识别到了多少个物体,剩下的6个数不作处理
- 每组的第二个数是物体类别,参照上述labels数组,第三个数是置信度,剩下的4个数分别为上下左右的坐标
- 值类型都为float32
代码处理提示如下:
  public HornedSungemFrame getFrameResult(opencv_core.IplImage image, float[] floats) {
  int num = (int) floats[0];
  ArrayList<HornedSungemFrame.ObjectInfo> objectInfos = new ArrayList<>();
  if (num > 0) {
      for (int i = 0; i < num; i++) {
          HornedSungemFrame.ObjectInfo objectInfo = new HornedSungemFrame.ObjectInfo();
          int type = (int) (floats[7 * (i + 1) + 1]);
          int x1 = (int) (floats[7 * (i + 1) + 3] * FRAME_W);
          int y1 = (int) (floats[7 * (i + 1) + 4] * FRAME_H);
          int x2 = (int) (floats[7 * (i + 1) + 5] * FRAME_W);
          int y2 = (int) (floats[7 * (i + 1) + 6] * FRAME_H);
          int wight = x2 - x1;
          int height = y2 - y1;
          int percentage = (int) (floats[7 * (i + 1) + 2] * 100);
          if (type == 0) {
              continue;
          }
          if (percentage <= MIN_SCORE_PERCENT) {
              continue;
          }
          if (wight >= FRAME_W * 0.8 || height >= FRAME_H * 0.8) {
              continue;
          }
          if (x1 < 0 || x2 < 0 || y1 < 0 || y2 < 0 || wight < 0 || height < 0) {
              continue;
          }
          objectInfo.setType(labels[type - 1]);
          objectInfo.setRect(new Rect(x1, y1, x2, y2));
          objectInfo.setScore(percentage);
          objectInfos.add(objectInfo);
        }
    }
  return new HornedSungemFrame(IplImageToBitmap(image), objectInfos, num);
  }
效果展示:
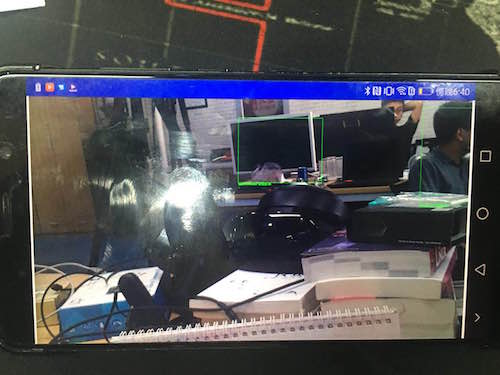
PS:拍摄技术有限,效果最好自行下载跑一下
友好提醒:因Android设备基本都是USB2.0,所以不建议使用1080P的图像,传输比较耗时,会有卡顿感,可以使用360P的图像,铺满屏幕即可
具体代码可去GitHub下载,地址如下 SungemSDK-AndroidExamples