Hello 2018
Quickstart
This article describes how to use the Mnist convolutional neural network to achieve digital recognition through the Sungem-SDK in the Android Studio development environment. The current example uses the camera that comes with the HornedSungem. If you need an external image source, please refer to SungemSDK-AndroidExamples.
step 1: Prepare the development environment
- Download the latest versionSungemSDK-Android.jar package
- Prerequisites:
- Make sure minSdkVersion is above Android 3.1
- Make sure the Android device supports OTG
- Android Studio 2.0 or higher
- Creating a project
- Please make sure to read the Android API before using the HornedSungem related functions and services. See API documentation for details.
step 2: Adding the SungemSDK-Android to Your Project
- Copy the downloaded package to the folder corresponding to your project according to actual needs, for example::
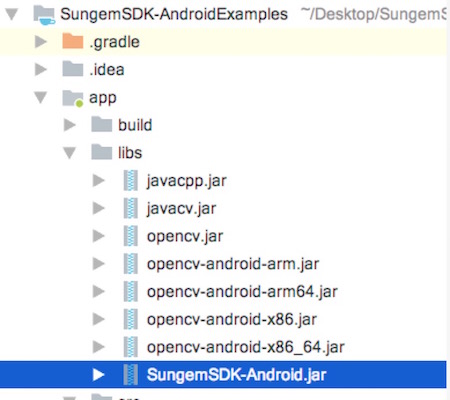
The lib contains the jar and .so required by horned-sungemSDK and javacv.
Node: Chinese characters cannot be included when adding the libs folder path, otherwise compilation will fail.
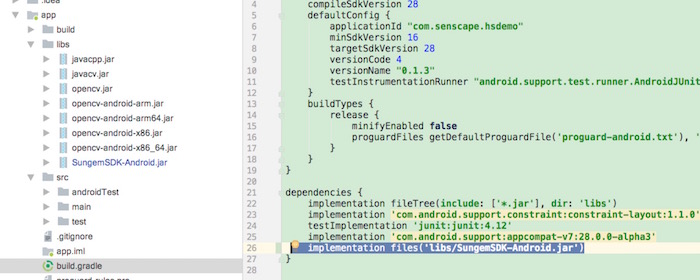
- Open the build.gradle file under the app folder from the Project Files view in Android Studio. Make a note of the path of the libs folder to the right of compile fileTree. This is where you will put the SungemSDK for Android files later on.
step 3: Adding Device Permissions
Open the AndroidManifest.xml file located under app > src > main and Add the required device permissions to the file.
<uses-permission android:name="android.permission.READ_EXTERNAL_STORAGE"/>
<uses-permission android:name="android.permission.WRITE_EXTERNAL_STORAGE"/>
<uses-permission android:name="android.hardware.usb.host"/>
<uses-permission android:name="android.hardware.usb.accessory"/>
<uses-feature android:name="android.hardware.usb.host"/>
step 4: Code description
Here’s a simple hello2018 example to explain how to use the HornedSungem.
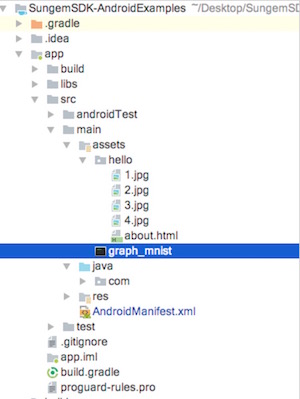
- Download graph_mnist graph file and four test pic,create a new assets package under your module and copy the downloaded files to this directory, as shown in the figure:
Init HsDevice, used for HornedSungem communication and display results, as follows:
mHsDevice = new HsDevice(this) {
    @Override
    public void openSucceed(UsbDevice usbDevice) {
        Toast.makeText(MainActivity.this, "connection succeeded.", Toast.LENGTH_SHORT).show();
        mUsbDevice = usbDevice;
        mCbDevice.setChecked(true);
    }

    @Override
    public void openFailed() {
        mCbDevice.setChecked(false);
        Toast.makeText(MainActivity.this, "Please re-plug and allow permission", Toast.LENGTH_SHORT).show();
    }

    @Override
    public void disConnected() {
        mCbDevice.setChecked(false);
        Toast.makeText(MainActivity.this, "Disconnected", Toast.LENGTH_SHORT).show();
    }
};
Creating the Hello2018Thread class which extends HsThread, the core code is as follows:
@Override
public void run() {
    super.run();
    int status = openDevice();
    if (status != ConnectStatus.HS_OK) {
        return;
    }
    int id = allocateGraphByAssets("graph_mnist");
    if (id<0) {
      return;
    }
    for (int i = 1; i < 5; i++) {
        int[] ints = new int[28 * 28];
        try {
            InputStream inputStream = mActivity.getAssets().open("hello/" + i + ".jpg");
            Bitmap bitmap = BitmapFactory.decodeStream(inputStream);
            bitmap.getPixels(ints, 0, 28, 0, 0, 28, 28);
        } catch (FileNotFoundException e) {
            e.printStackTrace();
        } catch (IOException e) {
            e.printStackTrace();
        }
        float[] float_tensor = new float[28 * 28];
        for (int j = 0; j < 28 * 28; j++) {
            float_tensor[j] = Color.red(ints[j]) * 0.007843f - 1;
        }
        int status_load = loadTensor(float_tensor, float_tensor.length, id);
        if (status_load == ConnectStatus.HS_OK) {
            float[] result = getResult(id);
            if (result != null) {
                int max = getMaxPossible(result);
                mHandler.sendEmptyMessage(max);
            }
        }
    }
}
public int getMaxPossible(float[] arr) {
    int max = 0;
    float max_f = 0;
    for (int i = 0; i < arr.length; i++) {
        float temp = arr[i];
        if (temp > max_f) {
            max = i;
            max_f = temp;
        }
    }
    return max;
}
Operating procedures
- build your module and run it on an Android device.
- Enter the launcher Activity.
- Connect HornedSungem by USB.
- Waiting for the pop-up permission request.
- Click OK to open the device.
- Get calculated results, as the picture shows:
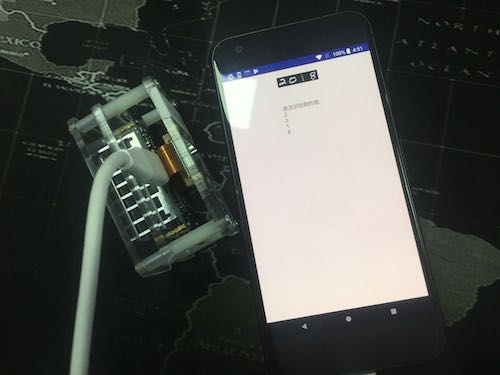
Node: If you do not open the device, the program will perform the openFailed() callback. If you want to use it again, please re-plug the device.
If you want to know more details, please click to view the example tutorial, or download the demo project.